How to make an electric guitar sound like an acoustic guitar?
I’ve honestly done multiple searches for this term on Google and I’ve yet to find an article that really does a fair job in answering this question correctly.
We’ve all been there, we do a quick search online, and then get a ton of sloppy information from various sources that consistently leave you thinking about what to do next.
With this post, my only objective is to give you the absolute ultimate guide on how to achieve an acoustic tone with your electric guitar and how to do so in the most realistic way possible.
Let’s get started!
Table of Contents
- How to make an electric guitar sound like an acoustic guitar?
- 1. Using the BOSS Acoustic Simulator Guitar Pedal (AC-3)
- 2. Using a Roland GR-55 Guitar Synthesizer with GK-3 pickup
- 3. Using a Fishman TriplePlay Wireless MIDI Guitar Controller
- 4. Using the Koogo Analog Acoustic Guitar Simulator
- 5. Using the JOYO JF-323 Wooden Sound Acoustic Simulator Pedal
- 6. Using the MOOER Acoustic Guitar Effect Pedal
- 7. Leaving your guitar signal as clean as possible
- 8. Adding reverb to your guitar
- 9. Changing your guitar strings
- 10. Adjusting your guitar controls and pickup selector
How to make an electric guitar sound like an acoustic guitar?
The best and cheapest way to make an electric guitar sound like an actual acoustic guitar is by buying an acoustic simulator pedal. Aside from this, you can also buy a Roland GR-55 Guitar Synthesizer with a GK-3 pickup, or a Fishman TriplePlay Wireless MIDI Guitar Controller, which will both let you convert your guitar signals into very realistic acoustic tones. You will also need to adapt your amplifier so that it doesn’t add any extra gain, and maybe even add a little bit of reverb to resemble the resonance of a real acoustic instrument.
Now, if you want to learn more about the advantages and disadvantages of using each one of these methods, then I encourage you to keep on reading.
I will go into details on which one is more budget-friendly, faster to set up, and also gives you the most versatility when playing.
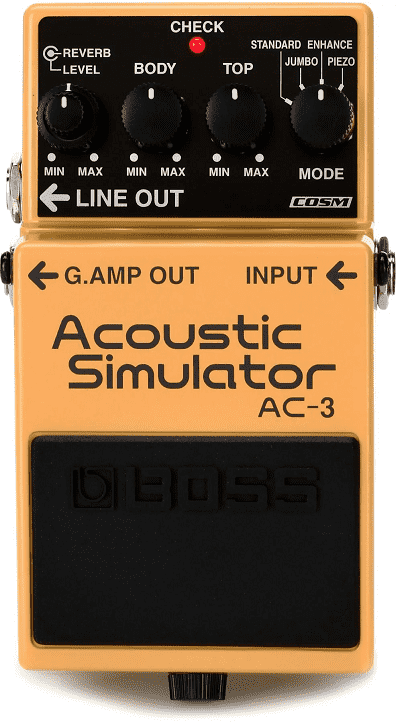
1. Using the BOSS Acoustic Simulator Guitar Pedal (AC-3)
This method is the easiest to set up and quite frankly the first one I would recommend to anybody looking to make their electric guitar sound like an acoustic guitar.
Why?
Because it’s literally just a guitar pedal!
(link to Amazon.com)
You can add it to your pedalboard signal chain and with just a quick tap, you will have an acoustic guitar on your hands.
This pedal uses Boss’s COSM technology to convert and transform your electric guitar input into beautiful acoustic guitar sounds.
And in case you also had no idea what COSM means:
COSM stands for Composite Object Sound Modeling. This technology analyzes the many factors that make up the original sound, such as the electrical and physical characteristics of the original, and then produces a digital model that can reproduce the same sound.
And what’s even crazier is that it comes equipped with two “BODY” and “TOP” knobs.
These two knobs can be used to adjust the acoustic guitar’s body resonance and harmonics. Doing this will let you produce a wide variety of tones that you would have otherwise not had.
Aside from this, it also lets you add a high-quality reverb (developed exclusively for the AC-3) to your instrument in case you want to make it sound more spacious, bigger, and fuller.
Simulation modes of the AC-3 BOSS pedal
It has 4 simulation modes that will give you different tones and emulate different types of acoustic guitars (info taken from the official AC-3 owner’s manual):
- 1- STANDARD: This tone is that of the popular Dreadnought acoustic guitar body style.
- 2- JUMBO: This setting provides a tone characteristic of an oversized guitar body, a tone featuring a rich bass response along with a beautiful high end.
- 3- ENHANCE: Providing a sharper attack than the standard tone, this tone does not become masked by the sounds of other instruments, even in bands and ensembles.
- 4- PIEZO: This setting provides the tone of a round-back acoustic guitar, with subdued body resonance and a unique attack.
As you can see, for each mode, the pedal will change a specific characteristic of your new acoustic guitar.
Let’s take a look at how this pedal works and what each of its settings sounds like:
I’m sure it’s more clear now after watching that video that this pedal is very capable of producing some awesomely authentic acoustic tones.
I encourage you to check it out and see it for yourself; the worse that can happen is that you don’t like it, you return it, and get your money back.
The best that can happen is that you discover your new favorite pedal!
Now, let’s take a look at some of the advantages and disadvantages of using this method:
Advantages of using a BOSS AC-3 Guitar Pedal
- Extremely easy to set up and use.
- Very easy to utilize in live performances.
- Doesn’t require any additional installation on your guitar.
- No need to buy an acoustic guitar.
Disadvantages of using a BOSS AC-3 Guitar Pedal
- Not a real acoustic guitar.
As a disadvantage, I decided to add that this is not a real acoustic guitar just to use it sort of like a disclaimer.
Remember that this still a pedal, so it’s really not going to be perfect; use it as an alternative, but certainly not as a definite solution.
Don’t expect any of these solutions to sound absolutely the same as a real acoustic guitar.
2. Using a Roland GR-55 Guitar Synthesizer with GK-3 pickup
A guitar synthesizer is very different from a guitar pedal and this is very important that you understand so that you don’t buy the wrong thing.
If you didn’t know what a synthesizer is, according to Wikipedia:
A guitar synthesizer is any one of a number of musical instrument systems that allow a guitarist to access synthesizer capabilities.
Synthesizers generate audio through methods including subtractive synthesis, additive synthesis, and frequency modulation synthesis.
It’s then that all of those sounds can be shaped and designed to sound differently by using modulations such as filters, envelopes, and low-frequency oscillators.
The Roland GR-55 Guitar Synthesizer is extremely easy to use and play and it has hundreds of great, ready-to-use sounds.
To put it another way, you will not only get to play your electric guitar like an acoustic guitar, there is certainly more to it.
By using this synthesizer, you will also have a library of other sounds and instruments such as a trumpet, violin, cello, vintage synths, and many more.
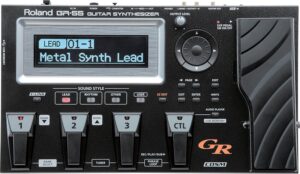
What does the Roland GR-55 look like?
This is essentially what the Roland GR-55 looks like:
(link to Amazon.com)
Some of its amazing features include having a built-in tuner, a USB audio player with foot control, and letting you choose individual sound styles like lead and rhythm.
Let’s take a look at this very interesting YouTube video to get an idea of what it sounds like:
As you can hear, it sounds very similar; plus I’m sure that the average person/audience won’t tell the difference between a real acoustic guitar and this.
Now, before we move forward, I need to say that something that this video fails to demonstrate and show is the GK-3 pickup that is required to use this synthesizer.
The way that the Roland GR-55 Guitar Synthesizer is able to work is essentially through two ways:
- With a commercially available GK-ready guitar (ex: a Godin LGXT Electric Guitar)
- Or you can use GK pickups such as the Roland GK-3
In simple terms, you can’t use the Roland GR-55 guitar synthesizer with just a regular electric guitar, you need one more thing.
It has to either be a GK-ready guitar or have GK pickups attached to it (the Roland GR-55 product that I linked before comes with both).
How does the Roland GR-55 Guitar Synthesizer work?
The independent pickup signal from every one of the six strings is separated and analyzed at high speed by an algorithm, which ensures a very fast and accurate response from the sound generator.
Your picking position is also detected and transmitted to the sound generator.
This gives the GR-55 a range of performance expression that’s much broader and more natural than any other guitar synthesizer.
To put all this into a better perspective:

Source: Roland GR-55 Guitar Synthesizer Owner’s Manual
Instead of plugging your electric guitar directly into an amplifier, your guitar output jack should be connected to the GK-3 divided pickup, and then the GK-3 pickup gets connected to the synthesizer.
After the sound is processed, from there, you can either choose to output your sound into your headphones or your guitar amplifier.
For those that haven’t seen the GK-3 divided pickup, this is what it looks like:
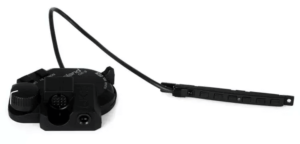
And once you finish the entire installation and attach it to your guitar, it would look like this:

One thing that you must notice is how the GK-3 pickup is placed close to where your other guitar pickups are.
Then the pickup selector is attached to your guitar body by utilizing your guitar strap buttons.
Let’s see some of the advantages and disadvantages of using this method to make your electric guitar sound like an acoustic guitar:
Advantages of using a Roland GR-55 Guitar Synthesizer
- MIDI functions are accessible in almost every recording software (ex: Logic, Ableton Live, FL Studio, etc).
- Built-in USB audio player with foot control.
- Built-in tuner included.
- Approximately 900 different modes or sounds to choose from.
- Installing and mounting the GK pickup is very straightforward.
Disadvantages of using a Roland GR-55 Guitar Synthesizer
- Expensive.
- Steep learning curve.
- Reading the manual a lot.
3. Using a Fishman TriplePlay Wireless MIDI Guitar Controller
This wireless MIDI guitar controller is known to be a composing, performing, and recording system that allows you to have a limitless range of instruments and sounds readily available in one place.
It can be installed or removed very quickly on any electric guitar, and it is not one of those solutions that require permanent changes to your instruments.
Meaning that you can move it around to any other guitar at any point, or just remove it completely.
One of my favorite things about this method, in particular, is that you won’t need any cables connected to your guitar for it to properly work.
Just as its name entails, everything works as a wireless MIDI connection.

(link to Amazon.com)
It includes the Hexaphonic pickup, a wireless controller, a wireless USB receiver, a fast charge power pack, the necessary mounting brackets and hardware, and a USB charging cable.
Let’s watch this YouTube video to really understand how this wireless guitar controller functions:
The acoustic guitar presets sound very realistic, in my opinion.
And like the Roland GR-55 method that we talked about before, we also require a pickup attached to our electric guitar body.
How does the Fishman TriplePlay Wireless MIDI guitar controller really work?
If you haven’t read a lot about MIDI guitars or made music with computers, then this might all sound very unfamiliar to you.
MIDI stands for Musical Instrument Digital Interface, and according to Wikipedia:
MIDI is a technical standard that describes a communications protocol, digital interface, and electrical connectors that connect a wide variety of electronic musical instruments, computers, and related audio devices for playing, editing and recording music.
Simply put, this wireless controller will interpret the signals that you send with your electric guitar and translate them into MIDI.
Then after that happens, you can make it sound like any instrument, real or imagined.
Now, something that many guitarists don’t understand before buying this product is that TriplePlay does not wirelessly transmit your traditional guitar sound.
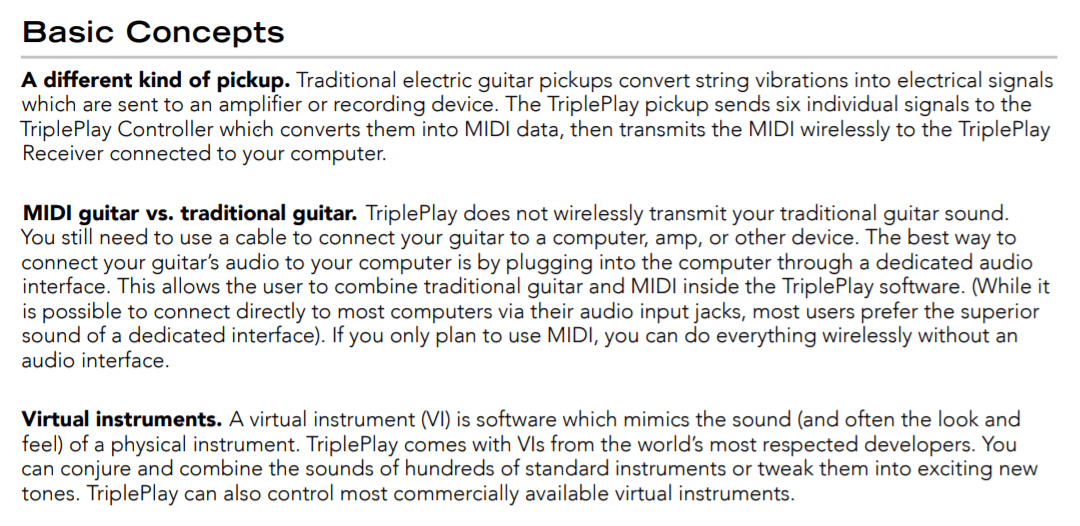
Source: Fishman TriplePlay Intro Guide
If that sounded like gibberish, then let me try to explain it to you in other words.
You still need to use a cable to connect your guitar to an amplifier if you’re planning on using your guitar as the traditional instrument and not just as a MIDI controller.
The best way to do this is by connecting to the PC through a dedicated audio interface, but again, if you only plan to use it as a MIDI controller, then this doesn’t apply to you.
Advantages of using a Fishman TriplePlay Wireless MIDI Guitar Controller
- Wireless MIDI connection.
- Play guitar using your phone (some apps even allow you to connect your guitar to your phone).
- Accurate real-time pitch detection and response.
- The product already includes all required mounting hardware, software, and tools.
Disadvantages of using a Fishman TriplePlay Wireless MIDI Guitar Controller
- A little bit less expensive, but still costs more than actual acoustic guitars out there.
- Difficult to use on live performances due to being dependable on exterior software.
4. Using the Koogo Analog Acoustic Guitar Simulator
Our 4th way to make an electric guitar sound like an acoustic guitar is once again, by using a guitar simulator pedal.
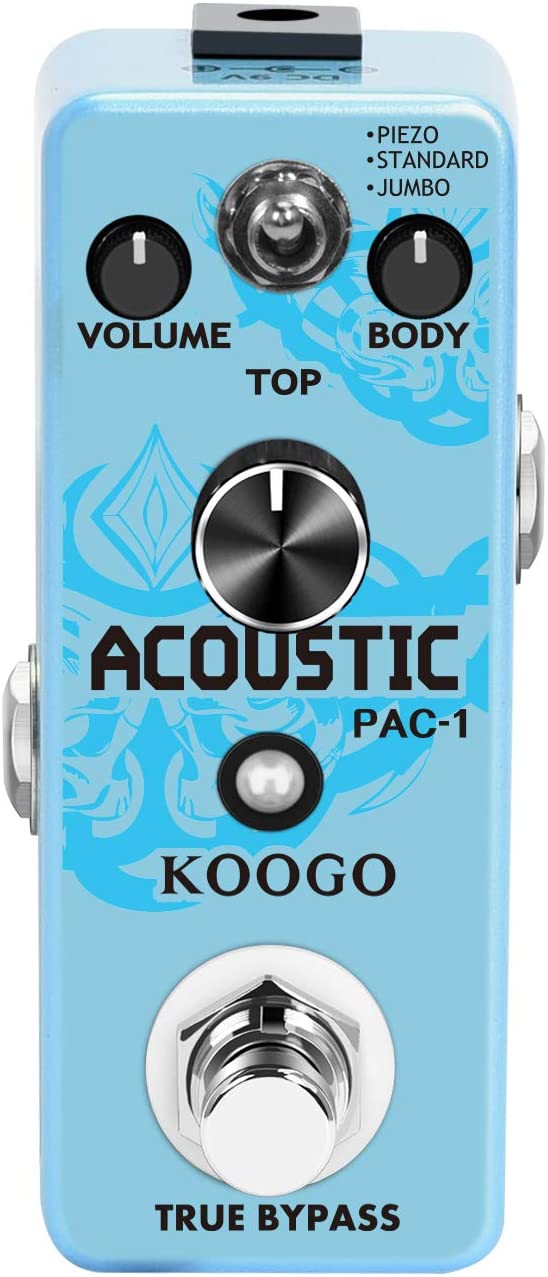
This time, we will be talking about the Koogo Analog Acoustic Guitar Simulator:
(link to Amazon.com)
And just like that, we’ve arrived at the cheapest alternative on this list, by far.
This pedal has 3 modes:
- Piezo: Less body and more treble.
- Standard: Basic great acoustic sound.
- Jumbo: Very full, deep tone.
Aside from being very small and easy to use, it also provides two of what I think are the most essential controls in a simulator pedal.
The ‘BODY’ and ‘TOP’ controls!
These two parameters, when changed correctly, allow you to get amazing tones by being able to customize your new “acoustic guitar” resonance and fullness.
How well does this Koogo Guitar Simulator actually sound like?
For some reason, there are not that many video reviews of this pedal online.
But with this YouTube video, we can seriously see how powerful this guitar simulator can be if we use it the right way.
If you’re not trying to spend a lot of money, then this is the method I would recommend to you.
Although is not the best and most ideal way, it sounds very decent and realistic enough.
Advantages of using a Koogo Guitar Simulator
- Very cheap.
- Simple and easy to set up.
- Convenient for live performances.
- Doesn’t require any additions on your guitar.
Disadvantages of using a Koogo Guitar Simulator
- For some people having such a small pedal is not ideal.
- Too trebly at times.
5. Using the JOYO JF-323 Wooden Sound Acoustic Simulator Pedal
This method is not the cheapest one on this entire list, but it’s definitely among the cheapest alternatives that we’ve mentioned.
By using this JOYO JF-323 pedal, you would basically be taking a similar approach to the first method that I listed.
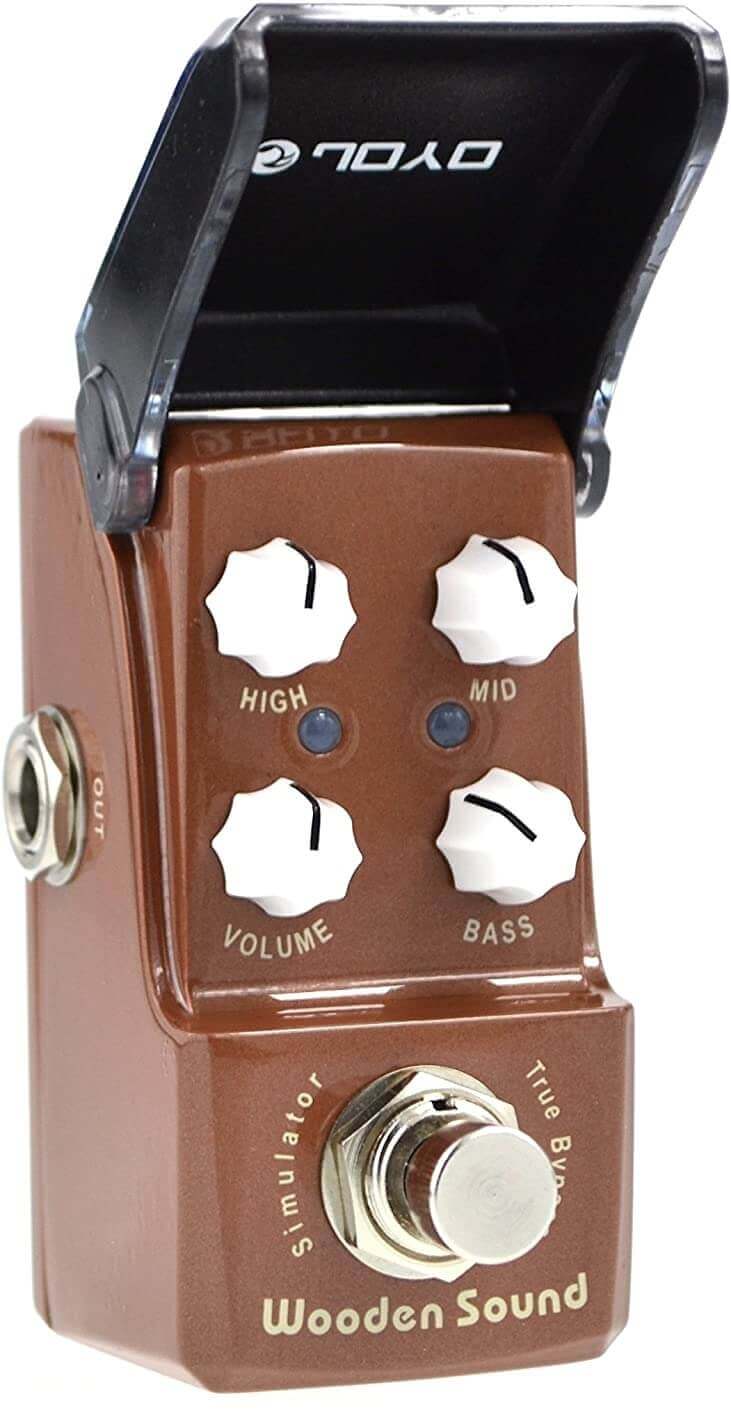
(link to Amazon.com)
A little bit about this pedal is that it allows you to control the high, mid, bass, and volume ranges of your guitar.
But to be quite frank, I think this is not enough, and it proves to give you way less room to customize your tone than all the other options until now.
It’s also very easy to set up and use, just like any other normal pedal.
Once you add it to your signal chain, you will have an acoustic guitar, one-foot tap away.
On their product description on Amazon, they describe this pedal as something that “actually sounds like you are playing an acoustic through a PA” (speakers, power amps, etc.) rather than just “sounding thin and trebly.”
But they also make sure to include that you must also add some reverb, delay, and chorus so that you can get the “perfect acoustic sounds.”
This, in my opinion, is another disadvantage since the pedal doesn’t give you the full solution that most people would expect, but rather about just 75% of it.
You will still need to have or buy those other pedals to add modulation to your tone.
What does the JOYO JF-323 actually sound like?
Let’s take a look at this YouTube video together so that we can actually hear this bad boy in action!
As you can hear, it sounds really good!
If you’re looking for a quick alternative to an acoustic guitar, then this could definitely do the job.
Most of the changes in tone that he was able to do in that video came from either the guitar pickup selector or by just changing the high, mid, bass, and volume levels.
No other parameters such as room, body, or top can be changed.
Advantages of using a JOYO JF-323 Pedal
- Lower price range.
- Fast real-time response.
- Easy to set up.
- Convenient for live performances.
- Doesn’t require any additions on your guitar.
Disadvantages of using a JOYO JF-323 Pedal
- Limited ability to customize your tone.
- Dependable on second solutions for modulations such as reverb, delay, and chorus.
6. Using the MOOER Acoustic Guitar Effect Pedal
Another great way to achieve very realistic and full acoustic guitar sounds could also be by using the MOOER Acoustic Guitar Effect Pedal.
This pedal is incredibly visually similar to the Koogo Analog Acoustic Guitar Simulator that we listed above (#4).
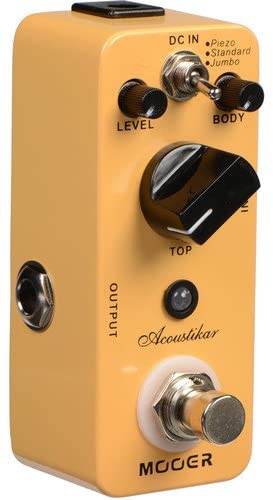
(link to Amazon.com)
One of the only few differences that you might spot is that it comes in yellow instead of light blue and that the ‘VOLUME’ knob got replaced with a ‘LEVEL’ knob instead.
Even the 3 working modes are named exactly the same:
- Piezo
- Standard
- Jumbo
A lot of people that have reviewed this pedal online have said that its quality and whether it’s useful or not, extremely depends on your own setup and the exact tone that you are looking for.
To put it another way, the use of pedals to make an electric guitar sound like an acoustic guitar will rely heavily on the guitar itself, the amps, the strings, etc.
All those factors will influence your tone and sound in all ways possible.
What does the MOOER Acoustic Guitar Effect Pedal actually sound like?
Let’s take a look at this YouTube video to be able to actually have an idea of what it sounds like.
It doesn’t sound bad at all!
And again, if you need a quick solution to play acoustic and electric guitar using the same instrument, then this could do the job.
Remember, the way that all of these pedals will perform depends on your setup, so in many cases, a video online will make it sound phenomenal, but then it’s the complete opposite once you get it.
Just keep that in mind at all times when reading written reviews online, since some of them can be very discouraging.
Advantages of using a MOOER Acoustic Guitar Effect Pedal
- Lower price range.
- Easy to set up.
- Good for live performances.
- No additions or installments on your guitar.
Disadvantages of using a MOOER Acoustic Guitar Effect Pedal
- For some people having such a small pedal is not ideal.
7. Leaving your guitar signal as clean as possible
These last few methods that I’m going to list are essentially in case that you’re not able to use any of the previous ones.
We will learn about all the small details that you should pay attention to on your guitar, amps, strings, pickups, and other effects pedals.
Leaving your guitar on a clean channel is one of those things that you must do in order to achieve the best acoustic guitar tone.
Your amplifier shouldn’t be adding any gain to your signal.
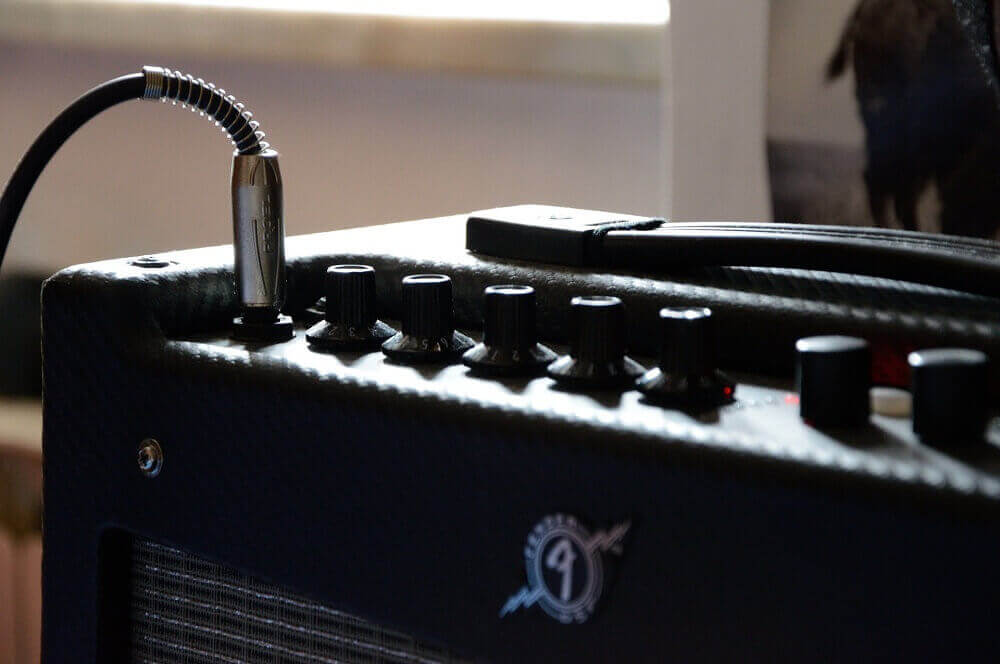
In case is necessary to add a little bit of gain, keep it as minimal as possible, and do so without distorting your guitar signal.
Other guitar settings that you should pay attention to are:
- Treble: Try keeping it at 12 o’clock and work your way from there.
- Bass: You want to have a little bit of bass to give it a fuller sound, but not to the point where it’s too much.
- Middle: I’m using a Fender Champion 100 2×12″ 100-watt Combo Amp, and it sounds really good in the 4-6 range.
8. Adding reverb to your guitar
Adding reverb can make or break your entire acoustic tone; it can take you from sounding very decently to extremely bad in just a matter of seconds.
Playing with your reverb levels is one of the few opportunities that you will have to mimic an acoustic guitar’s resonance as much as possible.
Notice I said, “as much as possible.”
I really want to make it clear that without a simulator pedal or a synthesizer, you won’t get as close to sounding like an acoustic guitar as you would get with the other methods.
To understand how reverb works, you should definitely watch this YouTube video by Music Is Win:
Pay attention to how the different settings on the pedal affect his guitar tone drastically.
Each one of them resembles a different environment or room, which really puts in better perspective what reverbs do to your sound.
9. Changing your guitar strings
There’s a lot of debate around whether your guitar strings affect your tone or not.
Should you get a different string gauge if you want to sound more acoustic? Should you even put acoustic guitar strings on your electric guitar?
Let’s start with talking about what exactly string gauge is.
According to Andertons Music:
A string gauge is the thickness/diameter of a guitar string. It’s measured in 1/1000th of an inch. For example, a 10-gauge string is 0.010 inches. Guitar string packs are usually referred to by their thinnest string, e.g. 10s.
If you do some research online you will find that thicker strings will give you more bass, and thinner strings produce more treble.
Acoustic guitars tend to be used with thicker strings, and electric guitars tend to have thinner strings.
So, if you think that you might be using the wrong set of strings, then I would encourage you to try out different string gauges until you find one that fits your needs.
Some guitarists, though, just think of their strings as a tool to give them the tone that they want, but not exactly what gives them their entire guitar tone.
In other words, if you feel already feel comfortable with your guitar strings, then you shouldn’t change them.
This YouTube video by Darrell Braun Guitar is a great resource when it comes to this topic:
You will hear him say that one of the most important things when it comes to your tone will be how you equalize your guitar.
If you watch the entire video, he will also reiterate that before you do anything with your guitar, you should study your amp settings.
To the extent that you know what each knob does and which level you enjoy playing at the most.
10. Adjusting your guitar controls and pickup selector
Sometimes, in the strange case that your amplifier fails to give you all the necessary controls to achieve your dream tone, you can also use your guitar to some extent.
For example, you can use your guitar pickup selector.
Let’s take a look at a Fender Stratocaster’s 5-way switch position diagram:
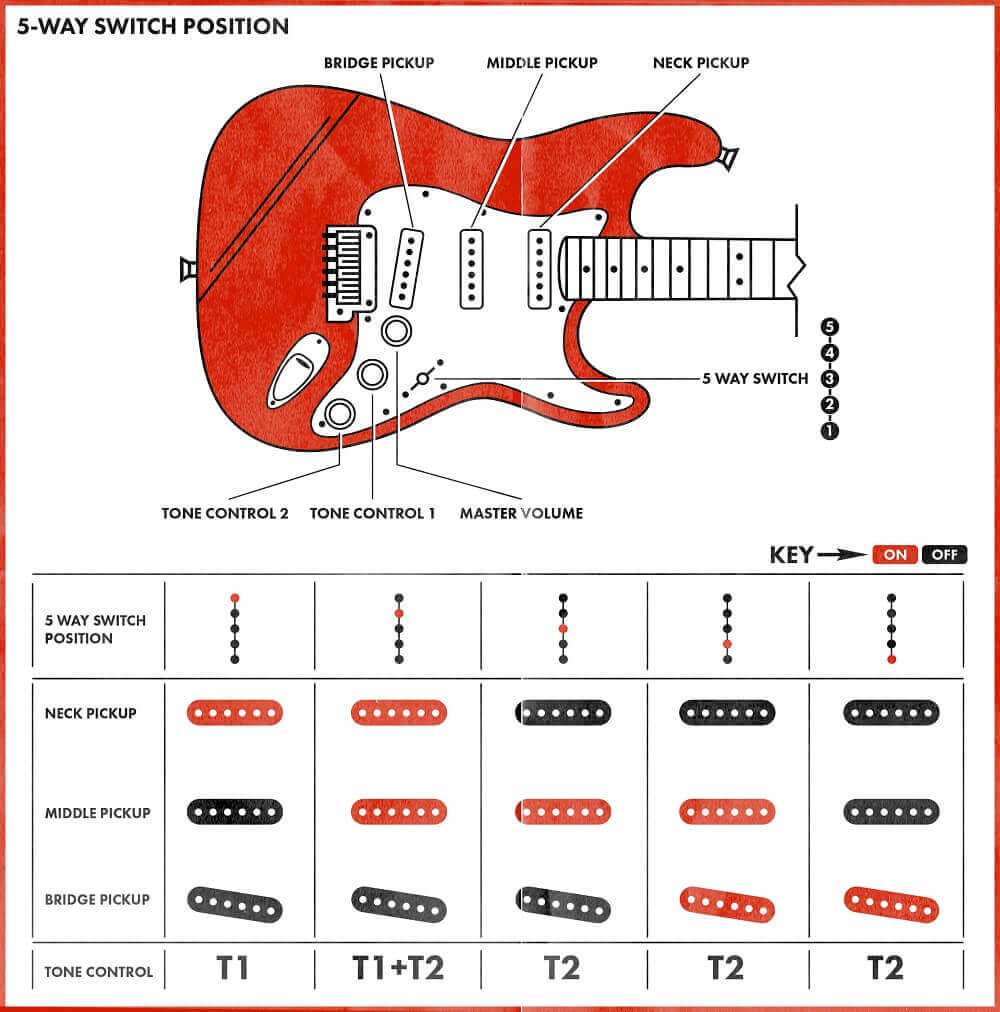
Image Source: Fender.com
You can see that you will have 2 tone controls, and 5 different switch positions to choose from; each one of them will give you a different feel and warmth in your sound.
In this case, as you go from position 5 to 1, your overall tone will go from a very warm tone to a sharper sound.
To be more specific, let’s go over the main differences between the neck and the bridge pickup:
Neck pickup vs Bridge Pickup
Neck pickup position:
- Less attack
- Bigger sound
- Lower-end frequencies
- Warmer
- Darker
- Muddy
Bridge pickup position:
- High output
- More attack
- High-end frequencies
- Brighter
- Tighter
- Trebly
Now it’s your turn to think about how exactly you want to sound and adjust accordingly.
Doing so should give you more leverage in getting closer to your desired tone and will provide you with multiple ways of adding dynamics to your music.

An avid storyteller and music lover that devotes all his free time to mastering the art of playing guitar. I’ve played acoustic for 6 years, and recently started playing electric guitars. Currently playing an Epiphone SG Special!

